728x90
원래 이번에는 테스트 코드를 작성해보려고 했지만
벌써 PCB가 도착했어요.
SF.Express는 코로나 때문에 좀 애매해서 DHL로 배송을 받았는데 제작 포함 5일 만에 도착했네요..
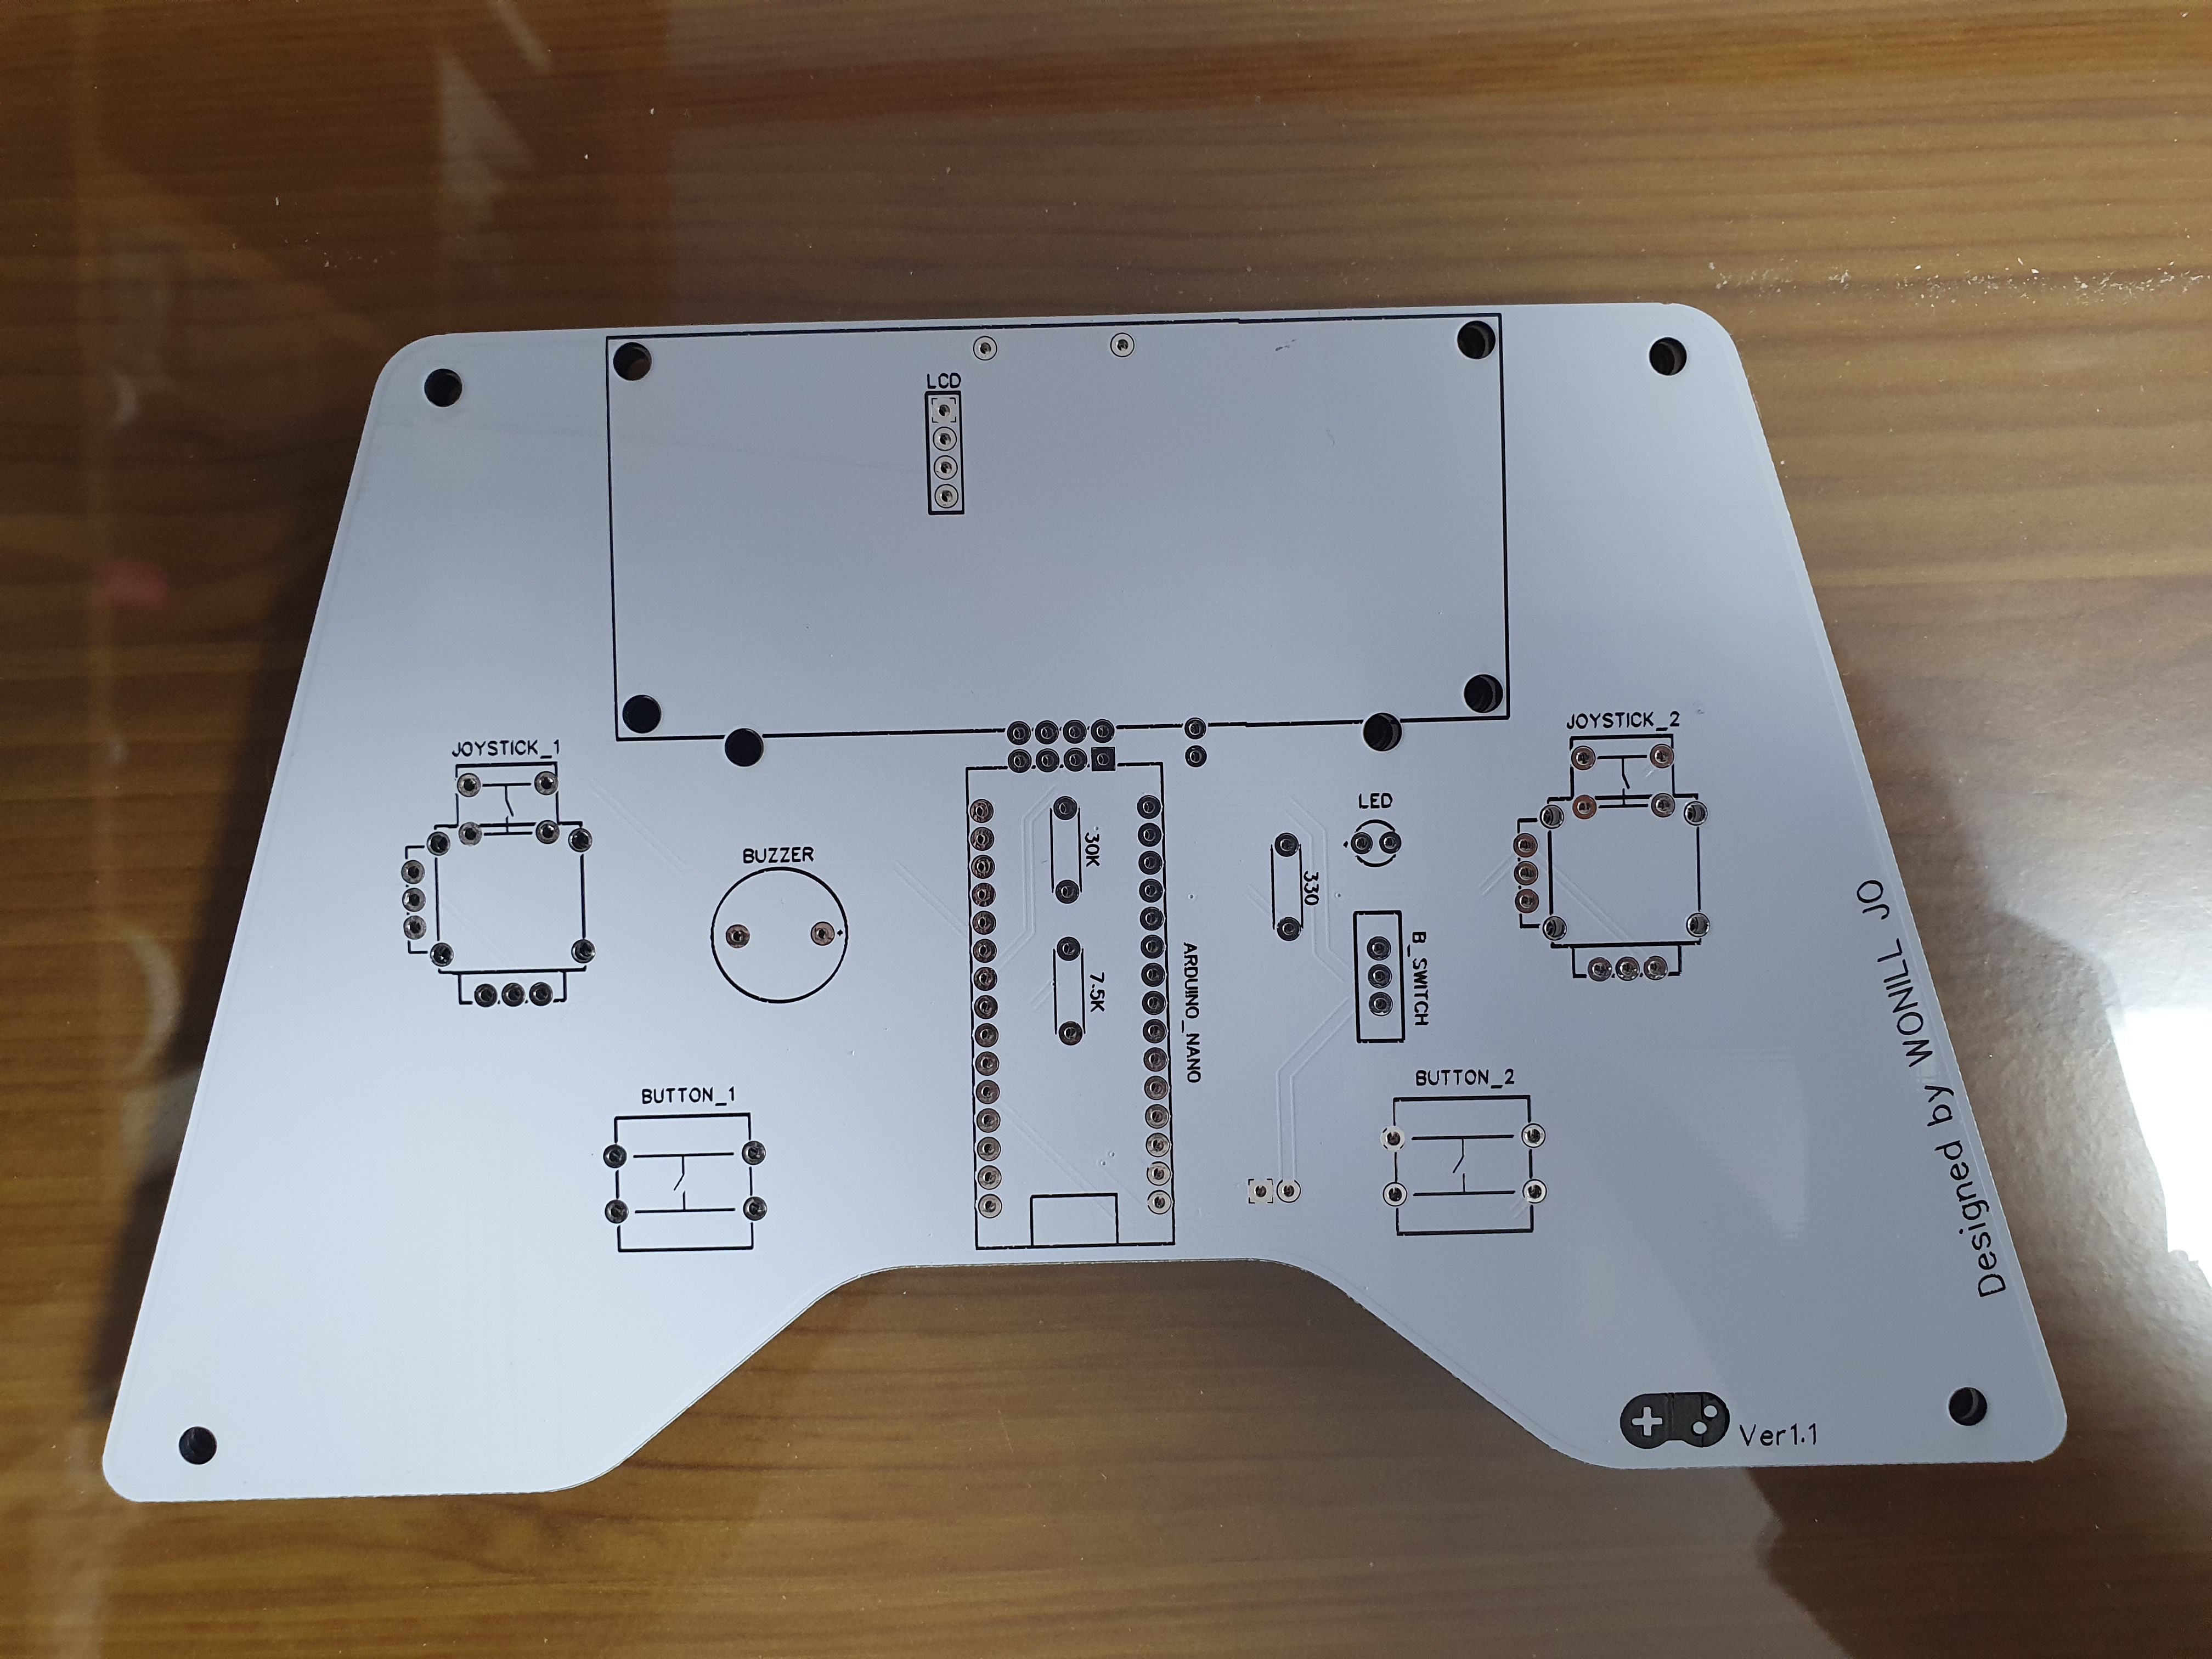

이번에도 깔끔하게 커팅이 되어 왔습니다.

이벤트인지는 잘 모르겠는데 두 번째 주문하니깐 검은 전선 테이프를 같이 보내줬어요.

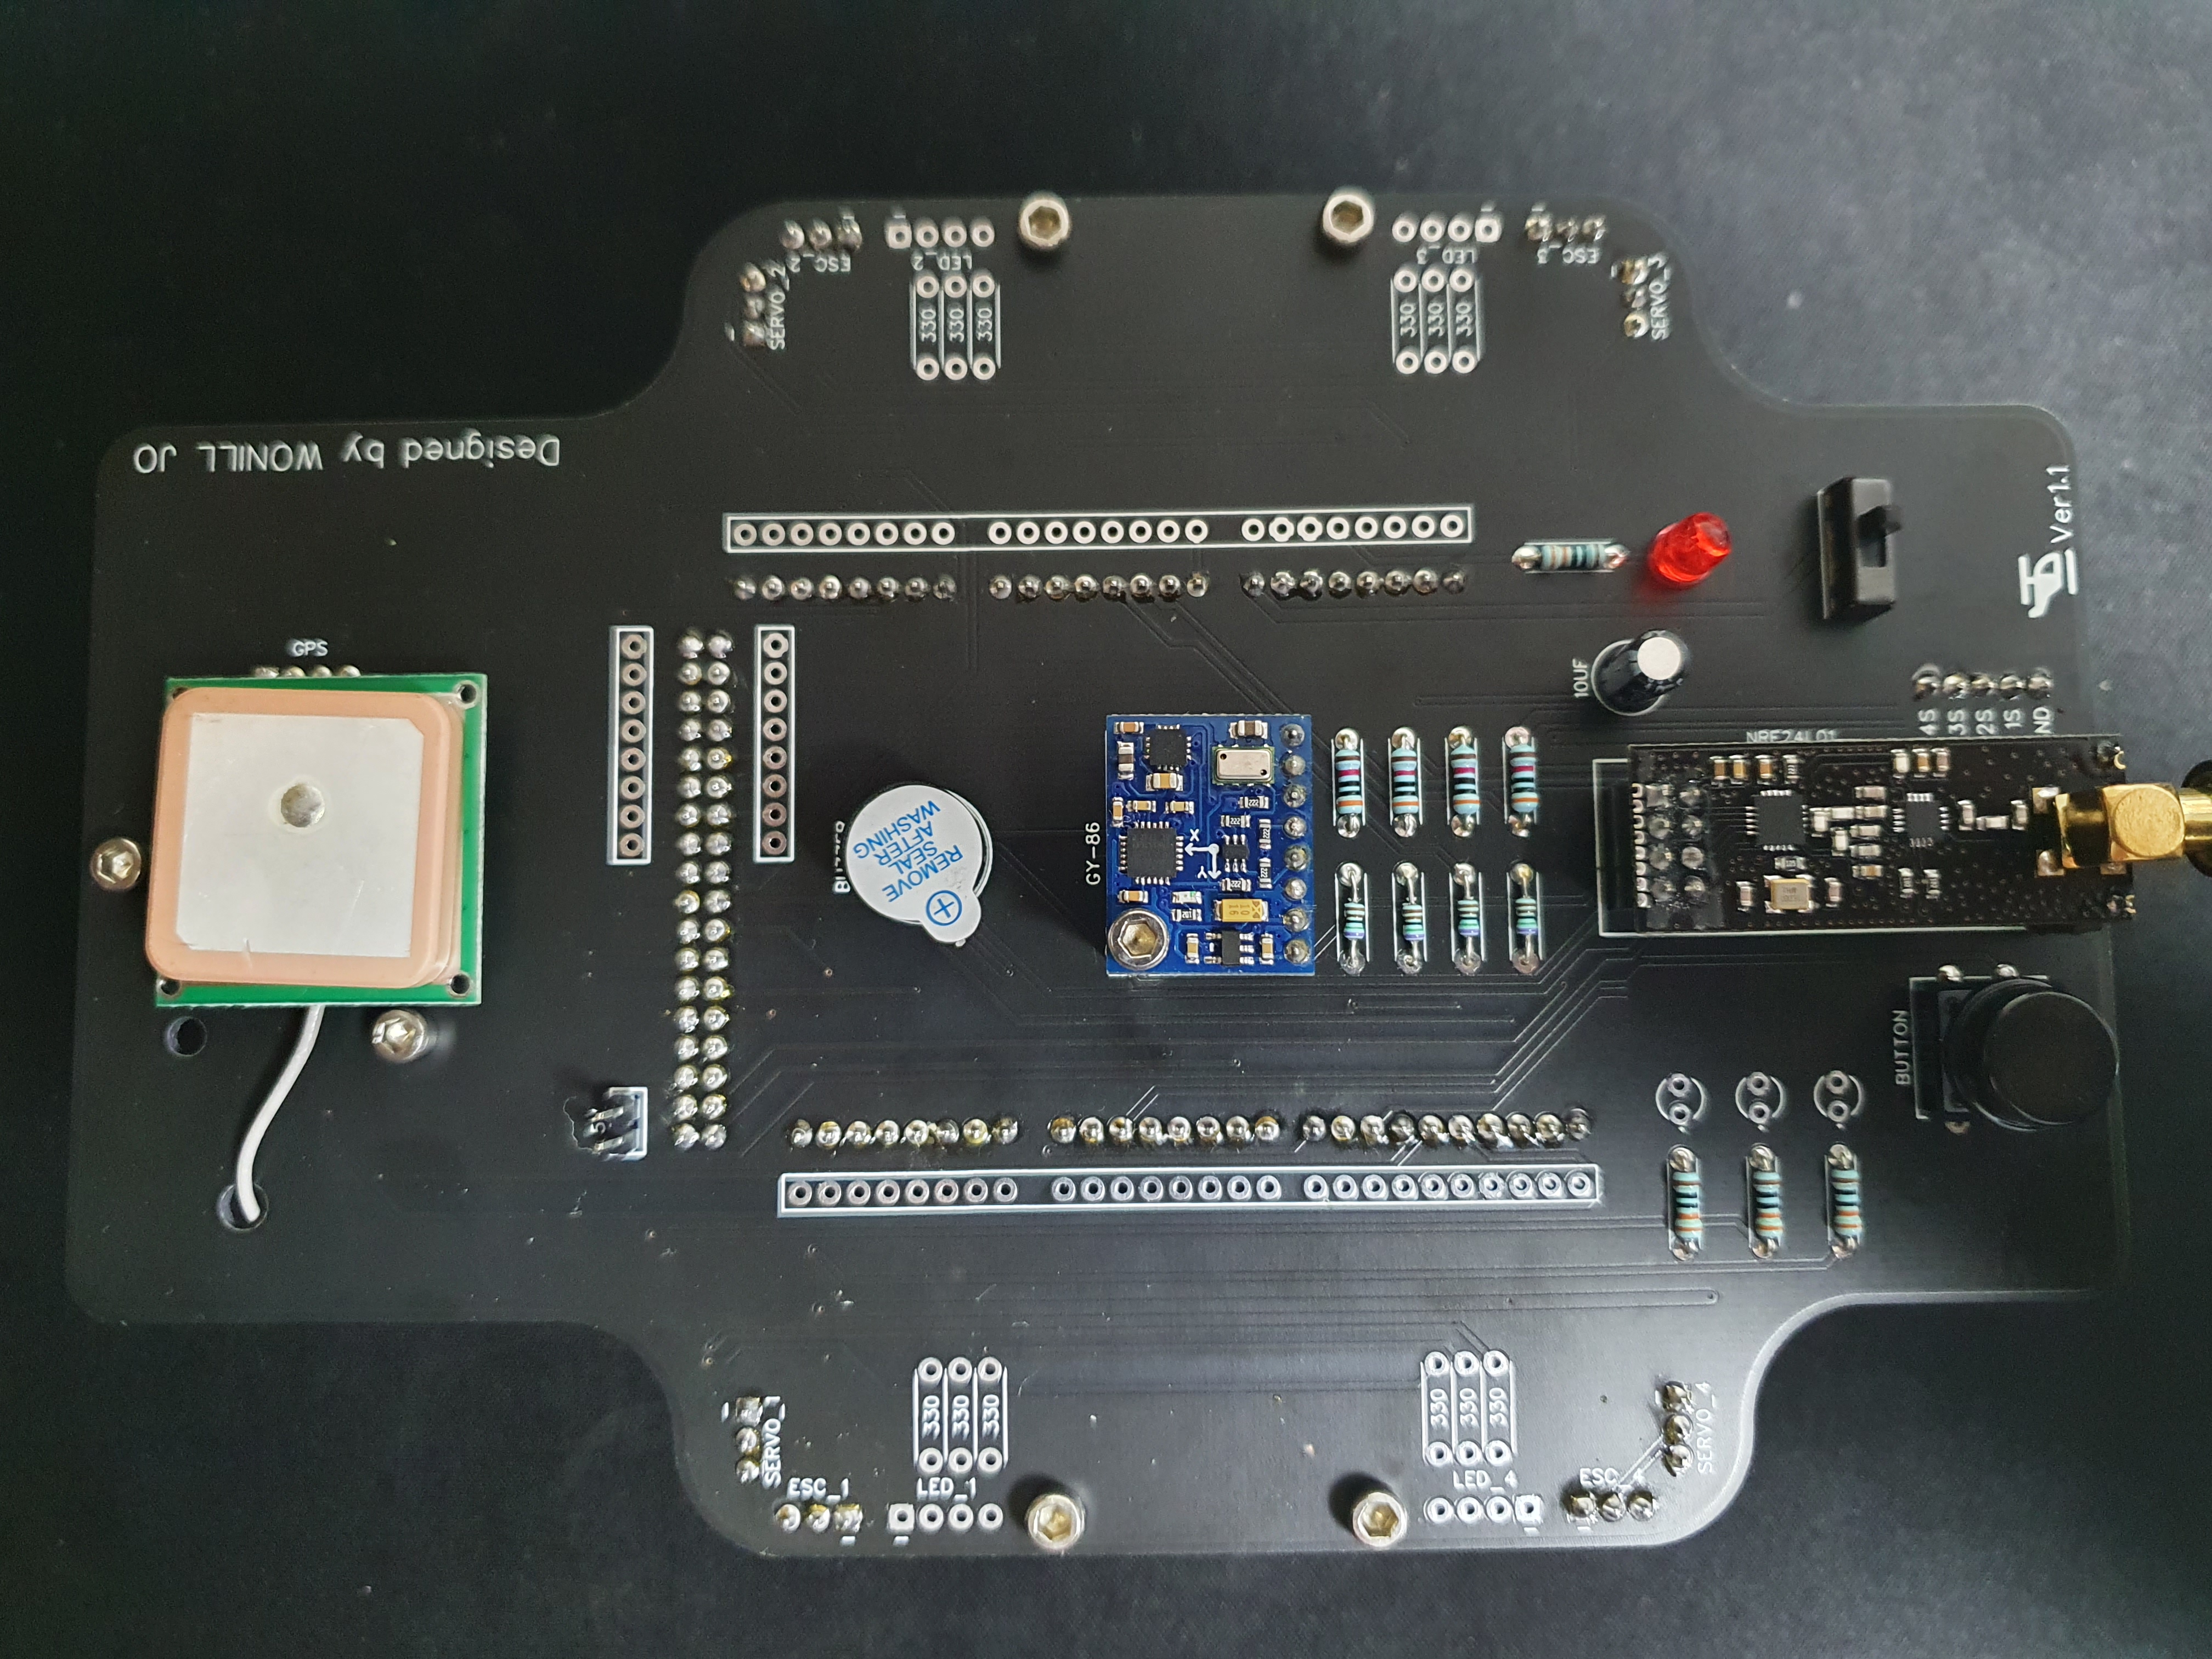
컨트롤러는 부품이 모두 다 와서 전부 납땜했는데
본체는 총알 바나나 소켓이 배송이 오지 않아서 모터랑 ESC는 연결을 안 했습니다.
Controller_test Code
#include <Wire.h>
#include <SPI.h>
#include <stdlib.h>

#include "RF24.h"
#include "I2Cdev.h"
#include "LiquidCrystal_I2C.h"
#include "MsTimer2.h"

#define Buzzer      2
#define JB_1        3
#define JB_2        4

#define CE          5
#define CSN         6

#define Button_1    7
#define Button_2    8
#define X_1         A0
#define Y_1         A1
#define X_2         A2
#define Y_2         A3
#define Battery     A6

static byte address[2][6] = { "00000", "11111" };
char send_data[32];
char receive_data[32];

int x1, y1, x2, y2;

RF24 nRF24(CE, CSN);
LiquidCrystal_I2C lcd(0x27, 16, 2); // 만약 안되면 0x3F를 사용

void setup() {
    Init();
}

void loop() {
    // 하나씩 주석을 해제하고 사용하세요.
    //Button_test();
    //JS_test();
    //Buzzer_test();
    //Battery_test();
    //LCD_test();
    //nRF24_test();
}

void Init() {
    Serial.begin(9600);

    // 부저 세팅
    pinMode(Buzzer, OUTPUT);

    // 버튼 세팅
    pinMode(JB_1, INPUT_PULLUP);
    pinMode(JB_2, INPUT_PULLUP);
    pinMode(Button_1, INPUT_PULLUP);
    pinMode(Button_2, INPUT_PULLUP);

    // 배터리 체커 세팅
    pinMode(Battery, INPUT);

    // 송수신기(nRF24L01)
    nRF24.begin();

    /*
     * RF24_PA_MIN < RF24_PA_LOW < RF24_PA_HIGH < RF24_PA_MAX
     * RF24_PA_MAX로 해주려면 10uF를 연결해주는 것이 좋다.
     */
    nRF24.setPALevel(RF24_PA_MIN);

    // address[0]주소를 데이터를 받는것에 사용
    // address[1]주소를 데이터를 보내는것에 사용
    nRF24.openReadingPipe(1, address[0]);
    nRF24.openWritingPipe(address[1]);

    // 수신모드
    nRF24.startListening();

    // LCD 세팅
    lcd.begin();
    lcd.clear();

    delay(50);
}

void Button_test() {
    Serial.print("JB1 : ");
    Serial.print(!digitalRead(JB_1)?"push":"None");
    Serial.print("\tJB2 : ");
    Serial.print(!digitalRead(JB_2)?"push":"None");
    Serial.print("\tB1 : ");
    Serial.print(!digitalRead(Button_1)?"push":"None");
    Serial.print("\tB2 : ");
    Serial.println(!digitalRead(Button_2)?"push":"None");

    delay(100);
}

void JS_test() {
    x1 = analogRead(X_1);
    y1 = analogRead(Y_1);
    x2 = analogRead(X_2);
    y2 = analogRead(Y_2);

    Serial.print("x1 : ");
    Serial.print(x1);
    Serial.print("\ty1 : ");
    Serial.print(y1);
    Serial.print("\tx2 : ");
    Serial.print(x2);
    Serial.print("\ty2 : ");
    Serial.println(y2);

    delay(100);
}

void Buzzer_test() {
    // tone(핀번호, 주파수, 지속시간);
    tone(Buzzer, 3000, 200);

    delay(1000);
}

void Battery_test() {
    // 최대 25V까지 측정 가능
    Serial.print("전압 : ");
    Serial.print((analogRead(Battery) * 5.0) / 1024.0);
    Serial.println("V");

    delay(200);
}

void LCD_test() {
    lcd.clear();
    delay(500);
    /*
     * LCD화면
     * (0,0) (1,0) (2,0) ... (15,0)
     * (0,1) (1,1) (2,1) ... (15,1)
     */
    lcd.setCursor(2, 0);
    lcd.print("Hello World!");
    delay(500);
    lcd.setCursor(6, 1);
    lcd.print("Jo's");

    delay(1000);
}

void nRF24_test() {
    if(nRF24.available()) {// 송수신기가 정상적이면
        // 데이터 받기
        nRF24.read(&receive_data, sizeof(receive_data));
        if(strlen(receive_data) > 0) { //문자를 받으면
            Serial.print("받음 : ");
            Serial.println(receive_data);
        }
    }

    if(!digitalRead(Button_1)) { // 버튼1을 누르면
        nRF24.stopListening(); // 수신모드를 정지

        strcpy(send_data, "Controller");

        if(nRF24.write(send_data, sizeof(send_data))) { // 데이터 보내기
            Serial.print("보냄 : ");
            Serial.println(send_data);
        }
        else Serial.println("fail");

        nRF24.startListening(); // 다시 수신모드
    }

    delay(50);
}
사용하실 때는 loop() 함수 내에 주석처리돼있는 여러 함수들을 하나씩 해제하시고 사용하면 됩니다.
주의할 점은 마지막 "nRF24_test()"를 사용하실 때는 다음 글에 올려드릴 "Main_test"파일을 다른 아두이노 보드에
업로드하시고 사용해야 됩니다.
그리고 제가 "RF24.h"에 있는 함수를 이것저것 테스트를 해보면서 확인한 점은
"nRF24.write()"를 사용할 때 "아무도 받지 않으면 "False"를 리턴하고 누구든 받으면 "True"를 리턴"
입니다.
그래서 컨트롤러만 켜놓으면 계속 "Fail"이 나오는 것을 볼 수 있습니다.
사용할 때는 꼭 본체도 켜놓고 사용해야 됩니다.
다음에는 본체를 테스트할 수 있는 코드를 작성해보겠습니다.
헤더 파일들은 아래 첨부한 파일에 같이 들어있으니 참고하세요.
'프로젝트 > DIY 드론 만들기' 카테고리의 다른 글
| DIY드론 프로젝트 - BLDC모터 제어 (2) | 2020.04.25 |
|---|---|
| DIY드론 프로젝트[6] - Main Test Code (0) | 2020.04.24 |
| DIY드론 프로젝트[4] - PCB도착 (0) | 2020.04.05 |
| DIY드론 프로젝트[3] - PCB제작(2) (0) | 2020.03.24 |
| DIY드론 프로젝트[3] - PCB제작(1) (0) | 2020.03.24 |


